JK Wrangler 5.7 Hemi Swap — Complete Installation Guide (DIY Hotwire Path)
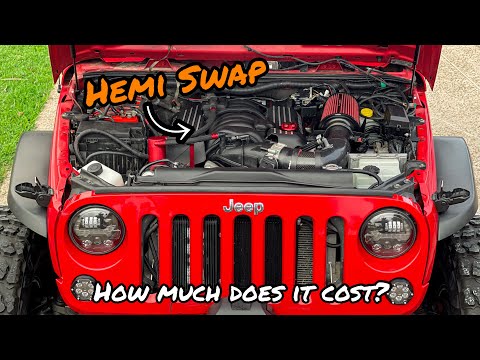
Step-by-step instructions for swapping a 5.7L Hemi into a JK Wrangler using the Hotwire Engine Harness Conversion Kit. This guide covers the Hotwire harness path only — not the AEV kit path. Donor engine is a 5.7L Eagle Hemi from a 2009–2012 Grand Cherokee or 2009–2010 Commander.
Before you start — prerequisites
This guide picks up where the parts checklist leaves off. Before your first wrench turn, all of the following need to be true:
- Parts list complete. You've gone through the V8 Swap Parts Checklist and the major items are either in hand or firmly on order with delivery dates you trust.
- Donor engine sourced and inspected. You have a specific 2009+ Eagle 5.7L Hemi — compression-checked, no rod knock, plug condition inspected. A video of the engine running before you paid for it is worth more than a seller's word.
- Hotwire harness ordered. Lead time is 4–8 weeks. If you haven't ordered it yet, do it today. You cannot complete the swap without it, and there is no good substitute.
- Covered workspace with lift or jack stands. A two-post or four-post lift is ideal. Four 6-ton jack stands and a quality floor jack work. A driveway in Phoenix in July does not work.
- Jeep off daily-driver duty. Block out at minimum three weeks of calendar time. Do not start this as your daily driver.
- Read the Hotwire manual front to back. Hotwire emails it as a PDF — ask for it before the harness ships. The wiring phase is where most swaps stall; the manual is the map.
- Emissions situation resolved. If you're in Arizona or a CARB state, you've confirmed your referee path. This swap has the best V8 emissions story in the JK world — Mopar-in-Mopar, single OBD-II port — but confirm before you cut.
Minimum tool list
Engine hoist (2-ton minimum) · Transmission jack · Torque wrenches in ft-lb and in-lb · OBD2 scanner with live data · Multimeter · MIG welder or access to one (for motor mount plates if going DIY fab) · Brake line flare tool if any brake lines get disturbed · Full socket set metric + SAE including deep wells and E-Torx · Impact driver · Breaker bar (24" minimum) · Pry bar set · Deutsch connector tool kit · Shop light
Time estimates by experience level
These are realistic calendar-day estimates, not optimistic shop hours. Each assumes one person working, full days on the build. The real driver of variance isn't skill — it's how often you stop mid-phase to go get a part you didn't have.
| Phase | Beginner | Intermediate | Experienced |
|---|---|---|---|
| 1 · Teardown | 1.5–2 days | 1 day | 4–6 hrs |
| 2 · Donor engine prep | 1 day | 6–8 hrs | 3–4 hrs |
| 3 · Transmission prep | 4–6 hrs | 3–4 hrs | 1–2 hrs |
| 4 · Mock-up and mounts | 1–1.5 days | 6–8 hrs | 3–4 hrs |
| 5 · Engine and trans install | 1 day | 6–8 hrs | 3–4 hrs |
| 6 · Hotwire harness | 1.5–2 days | 1 day | 6–8 hrs |
| 7 · Cooling, fuel, ancillaries | 6–8 hrs | 4–5 hrs | 2–3 hrs |
| 8 · Fluids and pre-start | 2–3 hrs | 1.5 hrs | 1 hr |
| 9 · First start and tuning | 1 day | 6–8 hrs | 3–4 hrs |
Teardown
- Document everything. Before you touch a connector or hose: photograph every harness routing, every bracket position, and every hose attachment point. Use your phone and organize by area. You will need these photos. Not having them costs you hours.
Pay extra attention to the transfer case linkage, the shift cable routing, and the trans harness connectors — these are the most-forgotten items.
- Drain all fluids. Engine oil, coolant, transmission fluid, and power steering fluid. Have drain pans under each. Don't let coolant sit on the ground — it's toxic to animals. Dispose properly.
- Disconnect battery, remove hood. Disconnect negative first. Remove the hood and set it somewhere safe with padding — you'll be hoisting an engine and can't afford a wing mirror moment.
- Remove front skid or bumper if needed for hoist clearance. Check that your hoist can get a hook over the engine with the bumper in place. If not, it comes off now, not after you've rolled the hoist in.
- Disconnect and label all electrical connectors on the 3.8 engine harness. Label with tape flags as you go. The JK factory harness will stay in the vehicle — the Hotwire harness will tie into it. You need to know what every connector was doing.
- Remove air intake, throttle body, and intake manifold. Plug the exposed ports with shop rags or tape to keep debris out of the intake during teardown.
- Disconnect cooling lines and heater hoses. Have a towel handy — there will be residual coolant even after draining.
- Disconnect and set aside A/C lines. If you're retaining A/C (recommended), tag the high and low side and set the lines out of the way. Don't kink them. If refrigerant was already evacuated, this is simple; if not, the system needs to be evacuated by a shop before opening the lines.
- Remove the power steering pump. Set it aside — you'll reuse it or swap to a Hemi-compatible bracket depending on your accessory layout.
- Remove the exhaust. Stock manifolds and downpipes. This is often the most seized part of the teardown. Penetrating oil the manifold studs the night before and let it soak.
- Support the transmission with the trans jack. Place it before you disconnect anything below the trans — you don't want it hanging on the drivetrain when it comes loose.
- Remove both driveshafts. Front and rear. Mark orientation before removal (use paint marker or scratch mark across both flanges). This matters — you'll reinstall them in the same orientation.
- Disconnect transfer case linkage and electrical connectors. The shift linkage and the t-case range switch are the two most-forgotten items. Label them.
- Unbolt the transmission crossmember. The JK crossmember doesn't fit the new trans anyway, but getting it out now clears the path.
- Unbolt the motor mounts. Two bolts each side through the frame rails.
- Lift engine and trans out as an assembly. Chain to the front and rear lift points on the 3.8 block. Keep the leveler on the hoist so you can tilt the assembly as needed to clear the crossmember and firewall. Go slow.
- Not supporting the transfer case independently when dropping the trans. The NP241 is heavy enough to crack its own case or strip the adapter if the trans drops and pivots away from it. Keep the trans jack under the trans until it's completely clear of the chassis.
- Skipping the photo documentation. "I'll remember" is not a plan. Spend 15 extra minutes photographing. It saves hours later.
- Rushing the exhaust stud removal. Snapped manifold studs on the head mean a head-off or drilling job. Soak them, use an impact gun with short bursts, and know when to stop and apply more heat.
Donor engine prep
The 5.7L Eagle Hemi goes in better than it comes out of the donor — the time you spend here is time you don't spend diagnosing on a hot engine bay floor.
- Clean and inspect the donor 5.7 Hemi thoroughly. Check for rod knock (cold start, warm idle), oil leaks at the valve covers and pan, seeping coolant at the water pump and thermostat housing, and spark plug condition. Pull all 16 plugs and check for fouling, gap wear, and color. A healthy Hemi has grey-tan plugs with consistent gap across all 16.
- Remove donor PCM, all wiring, and accessories you won't use. Keep the donor PCM, TCM, crank sensor, cam sensor, MAP sensor, and injector pigtails. These are what the Hotwire harness was built to accept.
- Install new timing chain, guides, and tensioner if donor has over 80,000 miles. This is highly recommended — 5.7 Hemi timing chains are a documented wear item, particularly on early Eagle motors. Replacing them on the stand costs 2–3 hours. Replacing them after the engine is in the Jeep costs 2 days.
- Install new water pump, thermostat, and thermostat housing. These are cheap parts with high consequence. The plastic thermostat housing on donor engines ages out — replace it now, not after first start.
- Install Hotwire motor mount adapters onto the Hemi block. Torque to Hotwire's specified values (in the kit documentation). Do not use generic hardware — the motor mounts carry the full engine load.
- Install the correct flexplate or flywheel for your chosen transmission (545RFE path uses the flexplate from the donor; confirm part number against Hotwire's compatibility chart).
- Refresh intake manifold gaskets and valve cover gaskets. Used Hemi blocks commonly seep at both. New gaskets are $80 from Fel-Pro and take 90 minutes. A coolant or oil leak into the intake after first start is a project-stopper.
- Pressure-test the coolant passages before drop-in. With the water pump and thermostat installed, plug the ports and pressure-test to 15 PSI. Hold for 10 minutes. If it holds, you're clear. If not, find the leak now.
- Skipping the timing chain on a high-mileage donor. "I'll do it later if it makes noise" is a promise you'll regret. Hemi timing chains are the most-replaced wear item on these motors at 80–120K miles. Pulling the engine to do it later costs you two days and a lot of frustration.
- Keeping the plastic thermostat housing from the donor. They crack. A new one is $25. A cracked housing on first start drains your coolant in minutes and can overheat a fresh engine fast enough to cause real damage.
- Using the wrong flexplate. The 545RFE and NAG1 use different flexplates. Confirm your part number before torquing the converter to the flexplate — getting this wrong means pulling the trans.
Transmission prep
This guide covers the 545RFE path as primary — it's the most common DIY choice, uses the same ATF+4 fluid as the JK's stock trans, and donor units are abundant. The NAG1 path requires a different bellhousing adapter and a separate crossmember solution; if you're on that path, the steps below apply but verify adapter compatibility separately.
- Inspect the donor 545RFE. Check the fluid condition — fresh red is good, dark brown or burnt-smelling means the trans lived a hard life. Pull the pan if you have any doubt and look for metallic debris or clutch material. A bad 545RFE you install is a bad 545RFE you'll pull out in six months.
- Rebuild or service the trans if there's any question. A trans drop mid-build is the most demoralizing thing that can happen to this project. A full rebuild kit runs $200–$400. If the fluid looks questionable, rebuild it now.
- Install the NP241 transfer case adapter. The JK's NP241 transfer case must be mated to the new 545RFE via an adapter from Advance Adapters or Novak. This adapter accounts for the different output shaft position between the donor trans and the JK factory trans. Do not skip this — the t-case will not physically bolt to the 545RFE without it.
- Check and replace output shaft seals. The adapter-to-t-case interface is a common leak point on post-swap builds. New seals are $10 insurance.
- Pre-fill the trans with fresh ATF+4 before installation. Filling through the dipstick tube after the trans is in is slow and messy. Pre-fill on the stand to get the pan about 2/3 full, then complete the fill after install.
NAG1 note
The NAG1 (Mercedes 5G-Tronic used in some 5.7 WK/XH donors) is a capable transmission and survives the Hemi well. It requires a different bellhousing adapter and a different crossmember mounting solution than the 545RFE. If your donor has a NAG1, plan on additional research before Phase 4. Both paths work — just confirm which trans you have before ordering adapters.
- Installing a trans with questionable fluid and hoping for the best. The 545RFE is a good transmission — but not if it was already slipping or burning. Inspect it thoroughly or rebuild it. The rebuild window is now, on the stand, not in six months with the Jeep back apart.
- Ordering the wrong t-case adapter. Advance Adapters offers multiple NP241 adapter configurations. Confirm which NP241 variant you have (NP241OR Rubicon vs. NP241J) before ordering — they use different input shaft specs.
Mock-up and motor mount installation
This phase is the most precision-sensitive part of the build. Dimensions established here dictate driveshaft lengths, steering clearance, and crossmember position. Go slow.
- Lower the Hemi and 545RFE into the bay dry (no fluids, no exhaust, no accessories attached beyond what's needed for positioning). Check overall clearances before committing to anything.
- Verify Hotwire motor mount plates position correctly against the JK frame rails. The plates should sit flat against the frame with the engine centered in the bay. If they don't sit flush, find out why before drilling.
- Mark and drill motor mount holes. Use a center punch to mark the drill points. Double-check your measurements. Triple-check before drilling — this is the one step where a mistake requires a welder to fix.
- Install motor mount plates. Some Hotwire kits bolt; some require welding. Read your specific kit documentation and confirm which version you have before picking up a drill.
- Verify transmission crossmember position. The 545RFE sits differently than the JK's stock trans. Most builders need to fabricate a new crossmember or use a Hotwire or Genright crossmember kit. Position the engine on mounts, let the trans hang, and measure where the crossmember needs to land.
- Check front driveshaft length. The 5.7 Hemi package sits approximately 1.5 inches forward of the stock 3.8 position. Measure your front driveshaft with the engine on the mounts. Most JK builders need a shaft shortened or a new custom shaft from Tom Wood's or Adams Driveshaft. Don't guess — measure twice, order once.
- Check rear driveshaft length. Same principle. Rear shaft length changes with the trans swap. Measure with everything bolted in position.
- Check steering shaft clearance at full suspension droop. Cycle the suspension through full droop by hand and verify the 5.7 Hemi's accessory drive doesn't contact the JK steering shaft at any point through the range of motion. The Hemi sits slightly differently than the 3.8 and binding here is a real-world issue.
- Not checking steering shaft clearance until after the engine is fully installed. If there's contact, you'll be pulling the engine back out to address it. Check it now, with the engine dry-fitted and the suspension cycled by hand.
- Ordering driveshafts based on stock specs instead of measuring your actual install. The mount position shifts with the Hemi — measure from your actual installed position. Tom Wood's and Adams Driveshaft both have measurement guides on their websites.
- Drilling motor mount holes without double-checking the engine is level and centered. Use a level. Check left-right symmetry. A crooked engine mount will misalign the drivetrain and cause vibration you'll spend weeks chasing.
Engine and transmission installation
- Final pre-drop check. Verify all prep is complete — coolant fittings torqued, all adapters tight, flexplate torqued to spec, timing chain fresh. Once this assembly is in the bay, accessing the back of the engine requires significantly more effort.
- Lower the engine and trans assembly into the bay. Use the engine leveler on your hoist — you'll need to tilt the assembly to clear the firewall and the front crossmember. Go slow, have a second person watching clearances on both sides.
- Seat the motor mounts. Get both sides seated before torquing either. Confirm the engine is level and centered before torquing down.
- Align the transmission to the crossmember and torque the trans mount. Position the crossmember, confirm the trans mount rubber is seated correctly, then torque the crossmember bolts to spec.
- Torque the motor mount bolts. Follow Hotwire's torque spec — it'll be in the kit documentation. Do not over-torque; the mount rubber compresses and needs to float slightly.
- Reconnect the driveshafts. Match the paint or scratch marks you made at teardown. Torque the U-joint strap bolts to spec — a loose driveshaft at highway speed is a catastrophic failure mode.
- Reconnect the transfer case shift linkage and electrical connectors. Verify the range switch is connected and that the linkage moves through all positions smoothly (2H, 4H, N, 4L) before moving forward.
- Torquing one motor mount before the other is seated. Get both seated and the engine level, then torque both. Torquing one side while the other floats puts stress on the mount and can cause a slight misalignment that affects the drivetrain.
- Not verifying driveshaft orientation before reinstalling. A driveshaft installed 180° out from where it came off will vibrate badly at speed. The marks from teardown tell you exactly where it was — follow them.
Hotwire harness installation
This is the most technically demanding phase of the swap. The Hotwire kit replaces the Hemi's factory PCM and harness with a standalone harness designed to work in the JK chassis, retaining your factory gauges, A/C control, cruise control, and ABS. 80% of first-start failures trace back to something done or skipped in this phase.
- Read the entire Hotwire instruction manual before touching a wire. This is not a "figure it out as you go" harness. Hotwire's documentation is well-written and specific — it answers most questions before you have them. Skipping this step is where most wiring problems start.
- Mount the Hotwire PCM in the JK firewall location. The kit includes a bracket. Confirm the location before drilling — it needs to be accessible for future tuning and diagnostics.
- Route the main engine harness. Follow Hotwire's routing guide for the JK specifically. Zip-tie the harness away from heat sources (exhaust, headers) and moving components. Give yourself slack at the engine-to-body connection point to account for engine movement on the mounts.
- Connect injector, coil, cam sensor, crank sensor, and MAP sensor connectors. Every connector in the Hotwire kit is labeled. If a connector doesn't have a clear mate, stop and check the manual before forcing anything.
- Connect the Hotwire-to-JK body harness adapter. This is the bridge between the Hemi PCM world and the Jeep's TIPM. It's what keeps your gauges, brake light switch, HVAC controls, and cruise control working. Follow Hotwire's connection order — some connections need to be made before others for the CAN bus to initialize correctly.
- Retain and connect the JK's ABS module. The Hotwire kit preserves factory ABS function. Do not disconnect or bypass the ABS module — reconnect it exactly as it was.
- Connect the O2 sensors. Pre-catalyst and post-catalyst, both banks (four sensors total). Follow the Hotwire wiring diagram exactly — mismatched O2 sensor positions will cause bank-specific fuel trim codes after first start.
- Ground the PCM and engine block to chassis. Hotwire specifies minimum 4-gauge wire for the main ground runs. Run new grounds from the battery negative to the block, from the block to the chassis, and from the engine to the firewall. Do not rely on old grounds from the 3.8 installation — run new wire.
- Verify no shorts before reconnecting the battery. With all connections made, use a test light or multimeter on the main fuse to confirm no direct shorts to ground before applying power. A direct short on first power-up can damage the Hotwire PCM.
A note on the OBD-II port
One of the advantages of the Hemi-in-Mopar swap: unlike LS swaps, the Hotwire harness routes the Hemi PCM through the Jeep's factory diagnostic connector. You end up with a single, standard OBD-II port that reads the Hemi PCM normally. Your reader or scanner works without adaptation. This is also the cornerstone of the emissions story — there's no jury-rigged port situation to explain to a referee inspector.
- Confusing Hotwire harness connectors with leftover JK harness connectors. Label everything as you work. If a connector doesn't have an obvious mate in the Hotwire kit, it may be a JK-specific function the kit handles differently — check the Hotwire FAQ and their support line before grounding it out or leaving it unconnected.
- Running undersized ground wire. Hotwire calls for 4-gauge minimum on the main grounds. Using 8-gauge or the stock 3.8 grounds will cause intermittent mystery codes under load — voltage drop on a ground looks exactly like a sensor fault to the PCM.
- Not reading the manual first. The Hotwire documentation specifically covers the JK and explains the connection sequence. Builders who skip it and figure it out backward spend an extra day debugging issues the manual would have prevented.
- Routing the harness too close to headers. The Hotwire harness uses quality wire, but it will degrade if run within a few inches of a hot exhaust surface. Plan the routing with exhaust heat in mind before you zip-tie anything permanently.
Cooling, fuel, and ancillary systems
- Install the radiator. Most JK Hemi builds use an upgraded radiator — the Mishimoto MMRAD-WRA-07 is the popular all-aluminum dual-row choice. If you're in Phoenix, this is not optional. The stock 3.8 radiator will not keep up with the Hemi in summer traffic. Confirm the mounting tabs match your JK model year before ordering.
- Connect the upper and lower radiator hoses. Use Hemi-specific silicone hoses — the inlet and outlet positions differ from the 3.8 and the factory rubber hoses don't reach. Verify all hose clamps are fully seated and tightened. A loose lower hose on first start will drain your coolant in seconds and can overheat the engine before you can shut it down.
- Connect the heater hoses. Verify both supply and return are connected and clamped. Squeeze the clamps by hand to confirm they're seated past the bead on the fitting.
- Fill the coolant system. Use 50/50 premixed Mopar OAT (orange) coolant — do not mix with the green ethylene glycol the JK shipped with. Bleed air from the system by squeezing the upper hose repeatedly while filling the reservoir, and leave the radiator cap loose during initial fill to allow air to escape.
- Install the fuel supply and return lines. Verify the push-lock fittings are the correct size for the JK's fuel line diameter. A mismatched quick-connect that looks seated but isn't will spray fuel under the hood on first start.
- Install the throttle body air intake. Route away from the battery and any heat sources. Secure all clamps.
- Install exhaust headers and mid-pipe. Long-tube headers don't clear the JK frame rails — shorty headers (Hooker BlackHeart or equivalent) are the right choice. Verify clearance at the steering shaft specifically; this is the tightest point in the JK bay for header clearance. The mid-pipe/Y-pipe will likely need to be custom-fabbed by a muffler shop — no bolt-on solution exists for this swap.
- Power steering: connect or delete. If retaining power steering, install the Hemi-compatible pump with the appropriate JK bracket kit and connect the high and low pressure lines. If deleting PS for an electric power steering conversion, cap the lines now and plan the EPS install as a second project.
- A/C lines: reconnect or cap. If retaining A/C (recommended), reconnect the high and low side lines. The A/C system will need to be evacuated and recharged by a licensed shop since the lines were opened — plan for a $150–$250 shop visit after first start and before the first summer drive.
- Not fully seating hose clamps on the lower radiator hose. This is the single most common cause of coolant loss on first start. The lower hose is under pressure and is the hardest to see clearly during installation. After installing, reach in and physically push on the hose while wiggling it — if it moves more than a millimeter, the clamp isn't seated.
- Using the wrong coolant type. The 5.7 Hemi requires Mopar OAT (orange, HOAT-free) coolant. Mixing it with the green ethylene glycol from the original JK system will gel and clog the system. Flush the old coolant out completely before filling with OAT.
- Skipping the steering shaft clearance check after headers are installed. Shorty headers change the geometry slightly. Cycle the suspension through full droop after the headers are on and verify nothing contacts the steering shaft at any point.
Fluids and pre-start check
- Fill engine oil. The 5.7 Hemi takes 7 quarts with filter. Use 5W-20 full synthetic — Mopar or equivalent (Pennzoil Platinum, Mobil 1). Do not use conventional oil on a fresh engine with potential dry-start risk.
- Fill transmission fluid. The 545RFE requires ATF+4 — do not substitute with Dexron, Mercon, or "universal" ATF. The friction modifiers in ATF+4 are specific to the 545RFE clutch packs.
- Fill the transfer case. ATF+4 per the NP241 spec (confirm with the adapter documentation — some adapter combinations specify a different fluid).
- Fill front and rear differentials. Check your axle ratio tags to confirm gear oil spec. Most JK Dana 30 and Dana 44 axles use 80W-90 conventional or 75W-90 synthetic. If you're running a Rubicon rear Dana 44 or Trac-Lok, there's an additive spec — follow it.
- Verify all electrical connectors are fully seated and locked. Walk around the engine bay and physically press on every connector. The lock tab needs to click. A half-seated connector that looks connected will create intermittent fault codes under vibration.
- Verify all hose clamps are tight. Use a screwdriver to confirm every clamp is snug. Focus on the coolant system first, then the fuel lines, then the intake.
- Verify no tools left in the engine bay. Lift the intake manifold cover. Check behind the engine. Check in front of the radiator. A ratchet extension in the engine bay sounds like rod knock.
- Crank the engine without starting to build oil pressure first. Remove the fuel pump fuse (or use the Hotwire harness's fuel pump disable if documented). Crank the engine in 5–10 second bursts, pausing 30 seconds between, for a total of 30–45 seconds of cranking. Watch for the oil pressure gauge to show movement. This pre-primes the oil pump and gets oil to the bearings before combustion.
This step is not optional. A dry start on a fresh engine causes real wear to the bearings and cam. The 30 seconds you spend doing this protects an engine that cost $3,000–$5,000.
- Skipping the dry-crank oil pressure prime. Every engine swap builder who's done one the wrong way tells the same story: "I just wanted to start it." Don't skip this. A fresh oil pump needs priming — the 5 minutes this step takes is cheap insurance on a $4,000 engine.
- Using the wrong transmission fluid. ATF+4 is not interchangeable with other automatic transmission fluids in the 545RFE. Wrong fluid causes the clutch packs to slip within the first few hundred miles. The fluid needs to go in clean and correct from the first fill.
First start and tuning
- Re-enable the fuel pump fuse. If you pulled it for the dry-crank step, reinstall it now. Key on and listen for the fuel pump prime — you should hear a brief buzz from the tank, then silence. That's the pump pressurizing the fuel rail. Key off, wait 5 seconds, then key on again to get a second prime cycle.
- Connect your OBD2 scanner. Plug in before the first crank attempt. If there are immediate fault codes before the engine fires, address them before starting. Common pre-start codes: cam/crank sensor seating issues, throttle position sensor not seeing expected voltage range.
- Crank the engine. A Hotwire-equipped Hemi typically starts within 2–3 seconds of cranking if the fuel prime is complete and the harness is correctly connected. If it doesn't start within 5–6 seconds of cranking, stop and diagnose rather than grinding away on the starter.
- First-start watch list — first 30 seconds:
- Look for coolant leaks immediately — lower hose, heater hoses, thermostat housing
- Listen for rod knock or unusual mechanical noise (shut down immediately if you hear either)
- Watch the oil pressure gauge — should climb to 20–40 PSI at idle within 5 seconds of start
- Watch for fuel leaks at the rail and fuel line connections
- Let the engine idle for 5 minutes. Watch temperature — a fresh engine with a new thermostat will idle cool for 3–4 minutes, then come up to operating temp (195–205°F). If temp climbs past 220°F and keeps rising, shut down and diagnose before continuing.
- Check for fault codes after the first warm idle cycle. Some codes are expected on first start and will clear after a few drive cycles (EVAP codes particularly). Codes related to O2 sensors, cam/crank sensors, and fuel trim should be investigated before the first drive.
- Driveway function test: Verify transmission shifts through all gears in the driveway (P, R, N, D, 2, 1). Verify transfer case engages 2H, 4H, and 4L cleanly. Verify ABS light goes off after initial system cycle. Verify brakes feel normal.
- First road test — 5 miles max, close to home. Listen for anything unusual. Check for vibration at highway speed (driveshaft balance or U-joint orientation). Confirm the trans shifts smoothly through all gears under light acceleration.
- 500-mile break-in protocol: Vary RPM through the full range during the first 500 miles — don't cruise at sustained highway RPM. Change engine oil at exactly 500 miles regardless of appearance. This removes the metal particles from initial ring seating.
First-start issues and fixes
| Symptom | Most likely cause | Fix |
|---|---|---|
| Won't start / no fuel pressure | Fuel pump relay, Hotwire fuel pump wire not connected | Check relay, verify Hotwire fuel pump output wire is connected to pump signal wire |
| Cranks but won't fire | Crank sensor connection, cam sensor, no fuel prime | Verify crank and cam sensor connectors are fully locked; key-cycle 3× to prime fuel rail before cranking |
| Rough idle / immediate stumble | Vacuum leak at intake manifold gaskets (common on used Hemi blocks), unmetered air | Spray carb cleaner around intake manifold perimeter at idle — idle change indicates vacuum leak location |
| Overheats on first warm-up | Air pocket trapped in cooling system | Let cool, loosen upper hose clamp slightly while warm to burp air, re-tighten, refill reservoir |
| CEL P0300 random misfire | Coil connector not fully seated, failing plug | Check all 8 coil connectors for lock tab click; inspect spark plug condition on affected cylinder |
| ABS light stays on | ABS connector not fully seated during harness install | Trace ABS connector from the module; verify fully seated and locked |
- Cranking for 10+ seconds without starting. If it doesn't start in 5–6 seconds, stop cranking and diagnose. Long cranking without starting washes fuel into the cylinders and can hydrolock the engine if there's a fuel delivery problem. Diagnose first: fuel pressure, codes, spark.
- Not watching coolant temp obsessively on the first warm-up. The first 10 minutes are when air pockets move, leaks show, and thermostats fail. Stay at the hood, eyes on the temp gauge, for the entire first warm-up cycle.
- Skipping the 500-mile oil change. Ring seating releases metal into the oil. Running past 500 miles on that oil puts metal particles through the bearings. Change it at 500 miles. No exceptions.
What to do after first start
Getting the engine running is the milestone, but the build isn't finished. Here's the sequence for the first few hundred miles:
- Get the A/C recharged. Schedule this at a licensed shop within the first week of driving. A dry compressor in a Phoenix summer will fail fast.
- Get a custom tune. The Hotwire PCM runs on a baseline tune that gets you running, but it doesn't know your tire size or gear ratio. A custom tune from Diablo Sport, HP Tuners, or a local Mopar shop corrects speedometer, optimizes shift points, and sets proper fuel trim for your specific build. Budget $300–$600.
- Change oil at 500 miles, then again at 3,000. Two early oil changes is cheap insurance on an engine that cost several thousand dollars.
- Inspect all fluid levels and check for leaks at 100 miles and 500 miles. Leaks that weren't visible in the shop show up under driving load and heat cycling.
- Re-torque the motor mount and driveshaft bolts at 500 miles. Heat cycling and vibration settle fasteners on a new install.